Introduction to Jetty
This is an introductory Jetty tutorial. The purpose of this tutorial is to get you started with Jetty. The tutorial has been created and tested on Linux. This tutorial covers Jetty version 11.
About Jetty
Jetty is an open source project providing an HTTP server, an HTTP client, and a Java servlet container. The project is a part of the Eclipse Foundation. Jetty is a mature project, which started in 1995. Jetty can be easily embedded in devices, tools, frameworks, application servers, and clusters.
Jetty also supports additional Java technologies including:
- SPDY
- WebSockets
- JNDI
- JAAS
- OSGi
- AJP
- JMX
Installing Jetty
In this tutorial we work on a local computer. Detailed instructions to install Jetty on a remote server are provided in a separate chapter. First, we download Jetty from the Eclipse’s download page to a directory of our choice.
We unpack the compressed file.
We list the contents of the directory. The bin directory contains utility scripts to help run Jetty on Unix systems. The lib directory contains all JAR files necessary to run Jetty. The modules directory has module definitions where a module is a configuration file that includes all the libraries, dependencies, XML and template INI files for a Jetty feature. The start.jar is used to invoke Jetty.
A JETTY_HOME environment variable is created.
Running Jetty
To run the Jetty server, we use the start.jar file.
We create start.d directory which contains the configuration of the server.
We run the server passing the start.jar file to the java command. The start.jar builds a classpath and executes a main java class with a classloader built from that classpath. By default the start.jar mechanism is configured to start the Jetty server, but it can be configured to start any Java main class.
We can now navigate a browser at this server at http://localhost:8080.
We use a command line tool curl to do the HTTP request. The server returns a 404 error—there is no application in the webapps directory yet.
JETTY_HOME & JETTY_BASE
Starting with Jetty 9.1, it is possible to maintain a separation between the binary installation of the standalone Jetty called Jetty home, and the customizations for a specific environment called Jetty base. Jetty home is the location for the Jetty distribution binaries, default XML configurations, and default module definitions. Jetty base is the location for configurations and customizations to the Jetty distribution.
We create a my-base directory which will be our Jetty base.
A JETTY_BASE environment variable is created. Jetty determines the Jetty home and Jetty base locations either from environment variables or from properties.
Three important items of a Jetty base are the start.d configuration directory, the start.ini configuration file, and the webapps directory. We use the start.jar to enable necessary modules of Jetty. The —add-module option adds the given module to the list of modules enabled at when Jetty starts.
The start.ini file is created and the deploy module is added to it. Also the webapps directory is created.
The http module configuration named http.ini is created in the start.d directory.
At this moment we have this content in our Jetty base directory. Actually, we have enabled more than two modules—modules may have dependent modules and these were enabled as well. For instance, by enabling the http module we have activated the server module as well.
The —list-modules option list all modules, both active and inactive. At the end of the output we have a tree of active modules.
It is recommended to sit in the Jetty base directory and to start the server by referencing the start.jar remotely.
First web application
We create and deploy our first web application with Jetty. The application will display a simple JSP page. We create a Jetty base from scratch to enable running JSP pages.
Jetty
Jetty — свободный контейнер сервлетов, написанный полностью на Java. Может использоваться как HTTP-сервер или в паре со специализированным HTTP-сервером (к примеру, с Apache HTTP Server). Первоначально распространялся под лицензией Apache 2.0 License, но после перехода в 2009 году в число приложений, разрабатываемых в рамках проекта Eclipse стал доступен и под Eclipse Public Licence (EPL).
Jetty начиная с версии 7 поддерживает спецификацию Servlet 2.5 API. Поддержка Servlet API 3.0 добавлена в Jetty 8.
См. также
Ссылки
| Eclipse Foundation | |
|---|---|
| AspectJ · BIRT · Buckminster · Eclipse · Equinox · EclipseLink · SWT · Mylyn · Jetty · JFace · Rich AJAX Platform · Virgo | |
| Лицензия: Eclipse Public License · Вебсайт: http://www.eclipse.org/ |
- Программное обеспечение по алфавиту
- Программное обеспечение с лицензией Apache Software License
- Программное обеспечение с лицензией Eclipse Public License
- Свободное программное обеспечение, написанное на Java
- Свободные веб-серверы
Wikimedia Foundation . 2010 .
Полезное
Смотреть что такое «Jetty» в других словарях:
Jetty — Archivo:Jetty logo.png Desarrollador Eclipse Foundation eclipse codehaus Información general … Wikipedia Español
Jetty — Développeur Mort Bay Consulting / eclipse.org Dernière version 7.1.6 (15 juillet 2010) … Wikipédia en Français
Jetty — Entwickler Eclipse Foundation Aktuelle Version 7.4.5 (25. Juli 2011) Aktuelle Vorabversion 8.0.0.M3 (27. Mai 2011) Betriebssystem Windows, Linux … Deutsch Wikipedia
Jetty — Jet ty, n.; pl.
Jetty — Jet ty, a. Made of jet, or like jet in color. [1913 Webster] The people . . . are of a jetty. Sir T. Browne. [1913 Webster] … The Collaborative International Dictionary of English
jetty — (n.) early 15c., from O.Fr. jetee a jetty, a projecting part of a building, also a throw, noun use of fem. pp. of jeter to throw (see JET (Cf. jet) (v.)). Notion is of a structure thrown out past what surrounds it … Etymology dictionary
jetty — jetty1 [jet′ē] n. pl. jetties [ME gete < OFr jetée, jetty, orig. pp. of jeter: see JET1] 1. a kind of wall built out into the water to restrain currents, protect a harbor or pier, etc. 2. a landing pier 3. an overhanging part of a building vi … English World dictionary
Jetty — Jet ty, v. i. To jut out; to project. [Obs.] Florio. [1913 Webster] … The Collaborative International Dictionary of English
jetty — *wharf, dock, pier, quay, slip, berth, levee … New Dictionary of Synonyms
jetty — [n] pier barrier, breakwater, dock, groin, landing, quay, seawall, slip, wharf; concepts 439,443,479 … New thesaurus
Jetty Tutorial for Beginners
In this article, we will give brief information about Jetty and provide examples of Java application deployment on Jetty. Our examples will consist of both standalone and Embedded modes of Jetty.
Jetty is a Servlet container and Web Server which is known to be portable, lightweight, robust, flexible, extensible and easy to integrate.
Jetty can be deployed as a standalone server and also can be embedded in an existing application. In addition to these, a Maven Jetty plugin is available in order to run applications in your development environment.
SPDY, WebSocket, OSGi, JMX, JNDI, JAAS are some of the technologies that Jetty integrates nicely.
Today, Jetty is widely used in many platforms both for development and production. Small to large enterprise applications. SaaS (such as Zimbra), Cloud Applications( such as Google AppEngine), Applications Servers(such as Apache Geronimo) and tools (such as SoapUI) are powered by Jetty.
Jetty is open source, hosted by Eclipse Foundation. Current version (as of June 2015) is 9.2.x. You can more detailed information on Jetty Home Page.
1.Jetty as a Standalone server
In the first part, we will configure Jetty as a Standalone Server.
1.1 Downloading and Installing Jetty
You can visit the downloads page and download the latest version (v9.2.11 currently) as an archive file in zip or tar.gz format. Size is about 13 MBs.
There is no installation procedure for Jetty. Just drop it to a folder as you wish and uncompress the downloaded archive file.
1.2 Prerequisites
The only prerequisite for Jetty 9 is having installed Java 7 in your environment. You can downgrade to Jetty 8 if you have Java 6. A complete Jetty-Java compatibility information can be viewed here.
1.3 Running Jetty
- Navigate to the directory where you unpacked the downloaded archive. I will call it JETTY_HOMEfrom now on.
- Run the following command:
When Jetty starts running successfully; it produces the a line in the log similar to the following:
By default, Jetty runs on port 8080, but we will see how to configure it in the next sections of this tutorial.
You can also check via the browser typing http://localhost:8080 as the URL. You will see a 404 error, since no application is deployed in the root context.
The response is as below:
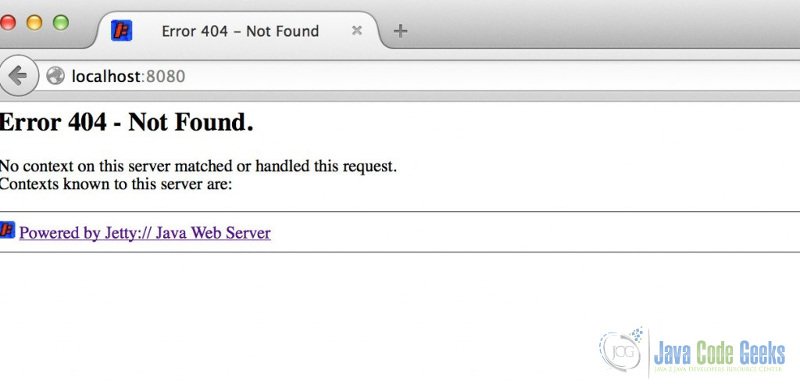
Server response when Jetty runs successfully
1.4 Changing the server port
- Navigate to the JETTY_HOME.
- Open the start.ini file with a text editor.
- Navigate to the line where the parameter jetty.port is configured.
- Change the parameter to the desired port number.
- Start Jetty again.
In the following segment, we set the Jetty port to 7070 instead of 8080
After we restart our server will run on port 7070.
1.5 Deploying Web Applications on Jetty
- Navigate to your JETTY_HOME folder.
- There is a directory named as webappsunderJETTY_HOME.Navigate there.
- Drop your WAR file in that folder.
The application is initialized immediately, you do not need to restart Jetty since the webapps directory is continuously monitored by the server.
There are a sample web applications under JETTY_HOME/demo-base/webapps/. You can pick one of them(for example async-rest.war) and copy to the webapps directory. As you copy the WAR file, the application will be initialized.
When you type http://localhost:7070/async-rest , you can see the application initialized.
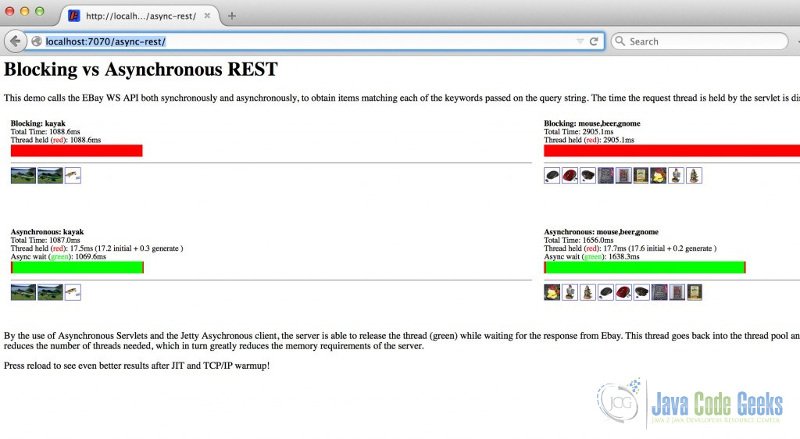
The application async-rest deployed on Jetty
1.6 Changing Webapps Directory
- Open the start.ini file underJETTY_HOME.
- Remove the comment before the parameter jetty.deploy.monitoredDirName.
- Change this parameter as you wish. Remember that the path should be relative to JETTY_HOME directory.
Now we can put our WARS in the jcgwebapps directory, which is at the same level as our JETTY_HOME.
2. Embedding Jetty in Your Application
Until now, we have skimmed through Jetty as a standalone server. However Jetty provides another great feature. Motto of Jetty is : “Don’t deploy your application in Jetty, deploy Jetty in your application”. It means that, you can embed jetty in your existing (most probably non-web) applications easily. On this purpose a very convenient API is provided to the developers. In the following sections, we will see how we can accomplish this.
2.1 Environment
- Java 8 (Java 7 will also do fine.)
- Apache Maven 3.x.y
- Eclipse 4.4 (Luna)
2.2 Creating the Maven Project
- Go to File -> New ->Other -> Maven Project
- Tick Create a simple project and press “Next”.
- Enter groupId as : com.javacodegeeks.snippets.enterprise
- Enter artifactId as : embedded-jetty-example
- Press “Finish”.
Now our maven project is created.
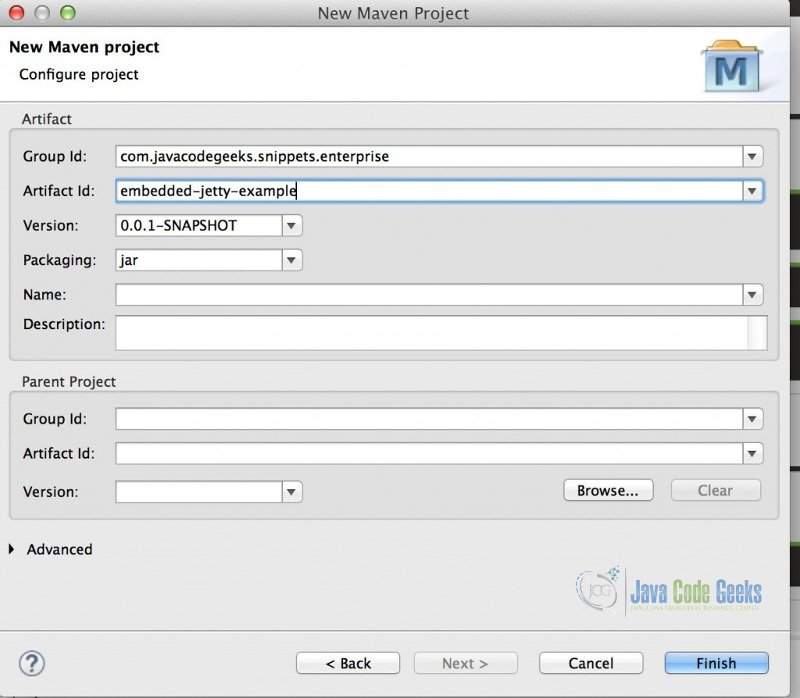
Creating simple Maven project in Eclipse
2.3 Adding dependencies for Embedded Jetty
- jetty-server : Core Jetty Utilities
- jetty-servlet: Jetty Servlet Utilities
You have to add these dependencies to your pom.xml. After the dependencies are added, your pom.xml seems as follows:
Now our project configuration is complete and we are ready to go.
2.4 Creating Embedded Jetty Server Programmatically
Now we are going to create an Embedded Jetty Server programmatically. In order to keep things simple, we will create the Server in the main() method of our application.
- Create package com.javacodegeeks.snippets.enterprise.embeddedjetty.
- Create a class named EmbeddedJettyMain.
- Add a main method to this class.
The code that creates and starts and Embedded Jetty is as follows:
- In the first line(Line 12), we create a Server on port 7070.
- In the next line(Line 13), we create a ServletContextHandler with the context path/example
- In Line 14, we bind the servlet class ExampleServlet (which is described below) to this servlet context handler created in the previous line.
- On the last line, we start the server.
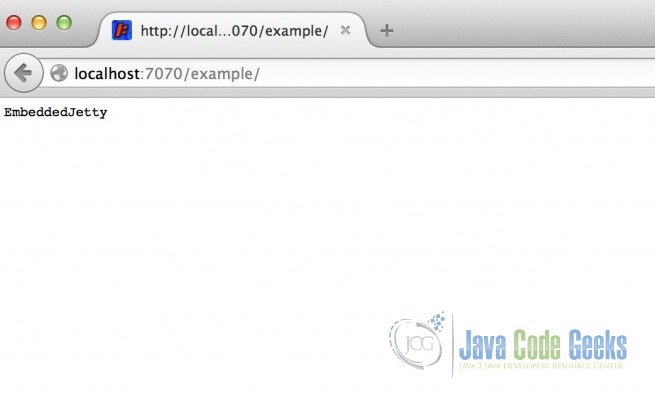
ExampleServlet is a simple HttpServlet, does nothing but returning a constant output “EmbeddedJetty” as the response.
2.5 Running Embedded Jetty
Run the EmbeddedJettyMain class through the Eclipse Run, Embedded Jetty starts to run on the defined port(7070).
You can access the application through your browser on the following URL:
http://localhost:7070/example
Here you can see the response below:
3. Conclusion
In this article, we have provided brief information on Jetty and discussed the steps to create standalone and Embedded Jetty servers.